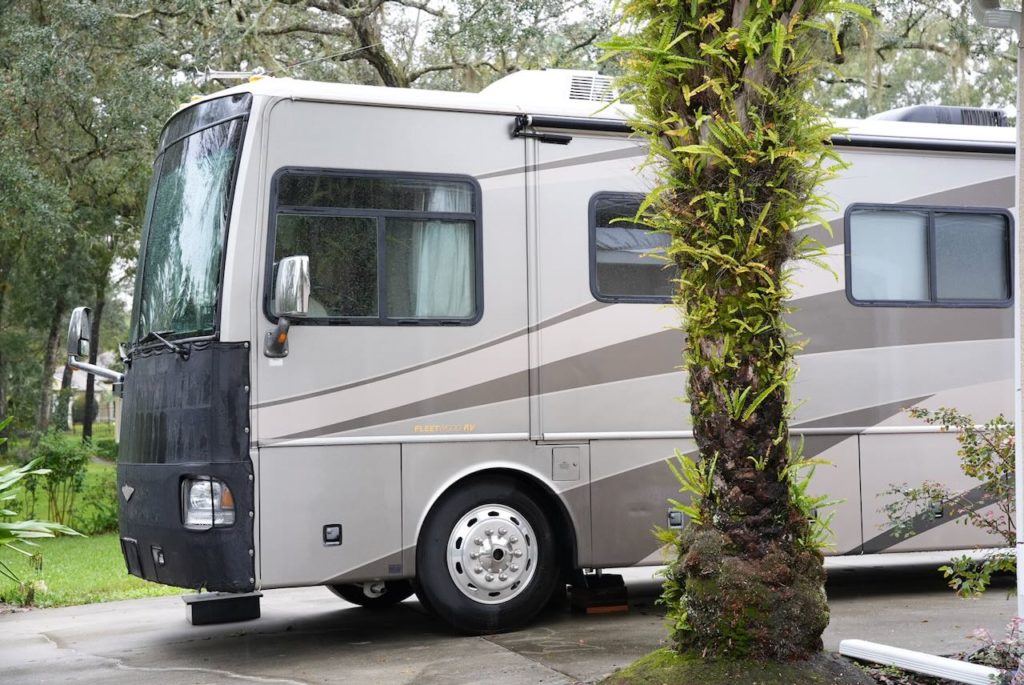
We recently completed an RV Renovation (RV makeover) on our 2004 Fleetwood Discovery 39J Diesel Pusher RV. With this RV being an older rig, it needed quite a bit of updating to brighten things up! One of the debates we had was whether or not to paint the cabinets. Because the cabinets are not super dark in color so we decided to leave them for the time being. You will have to let us know in the comments if you would paint them or not!
The total cost of our Renovation was $5,414.76
So, some of the breakdowns for these costs are as follows:
- $850 for tools we did not own that we needed
- $350 for flooring
- $700 for mattresses
- $400 Window Coverings
- $150 Kitchen Peel and Stick Backsplash
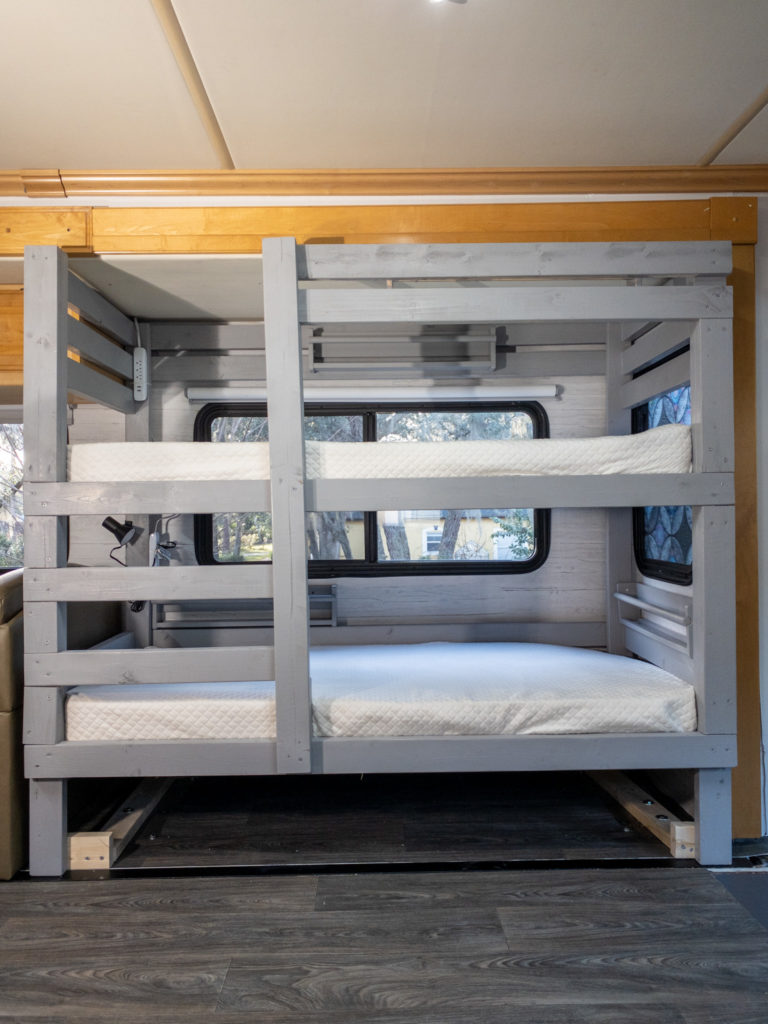
- Bunk Materials $210.86
- $100 – replacement lighting

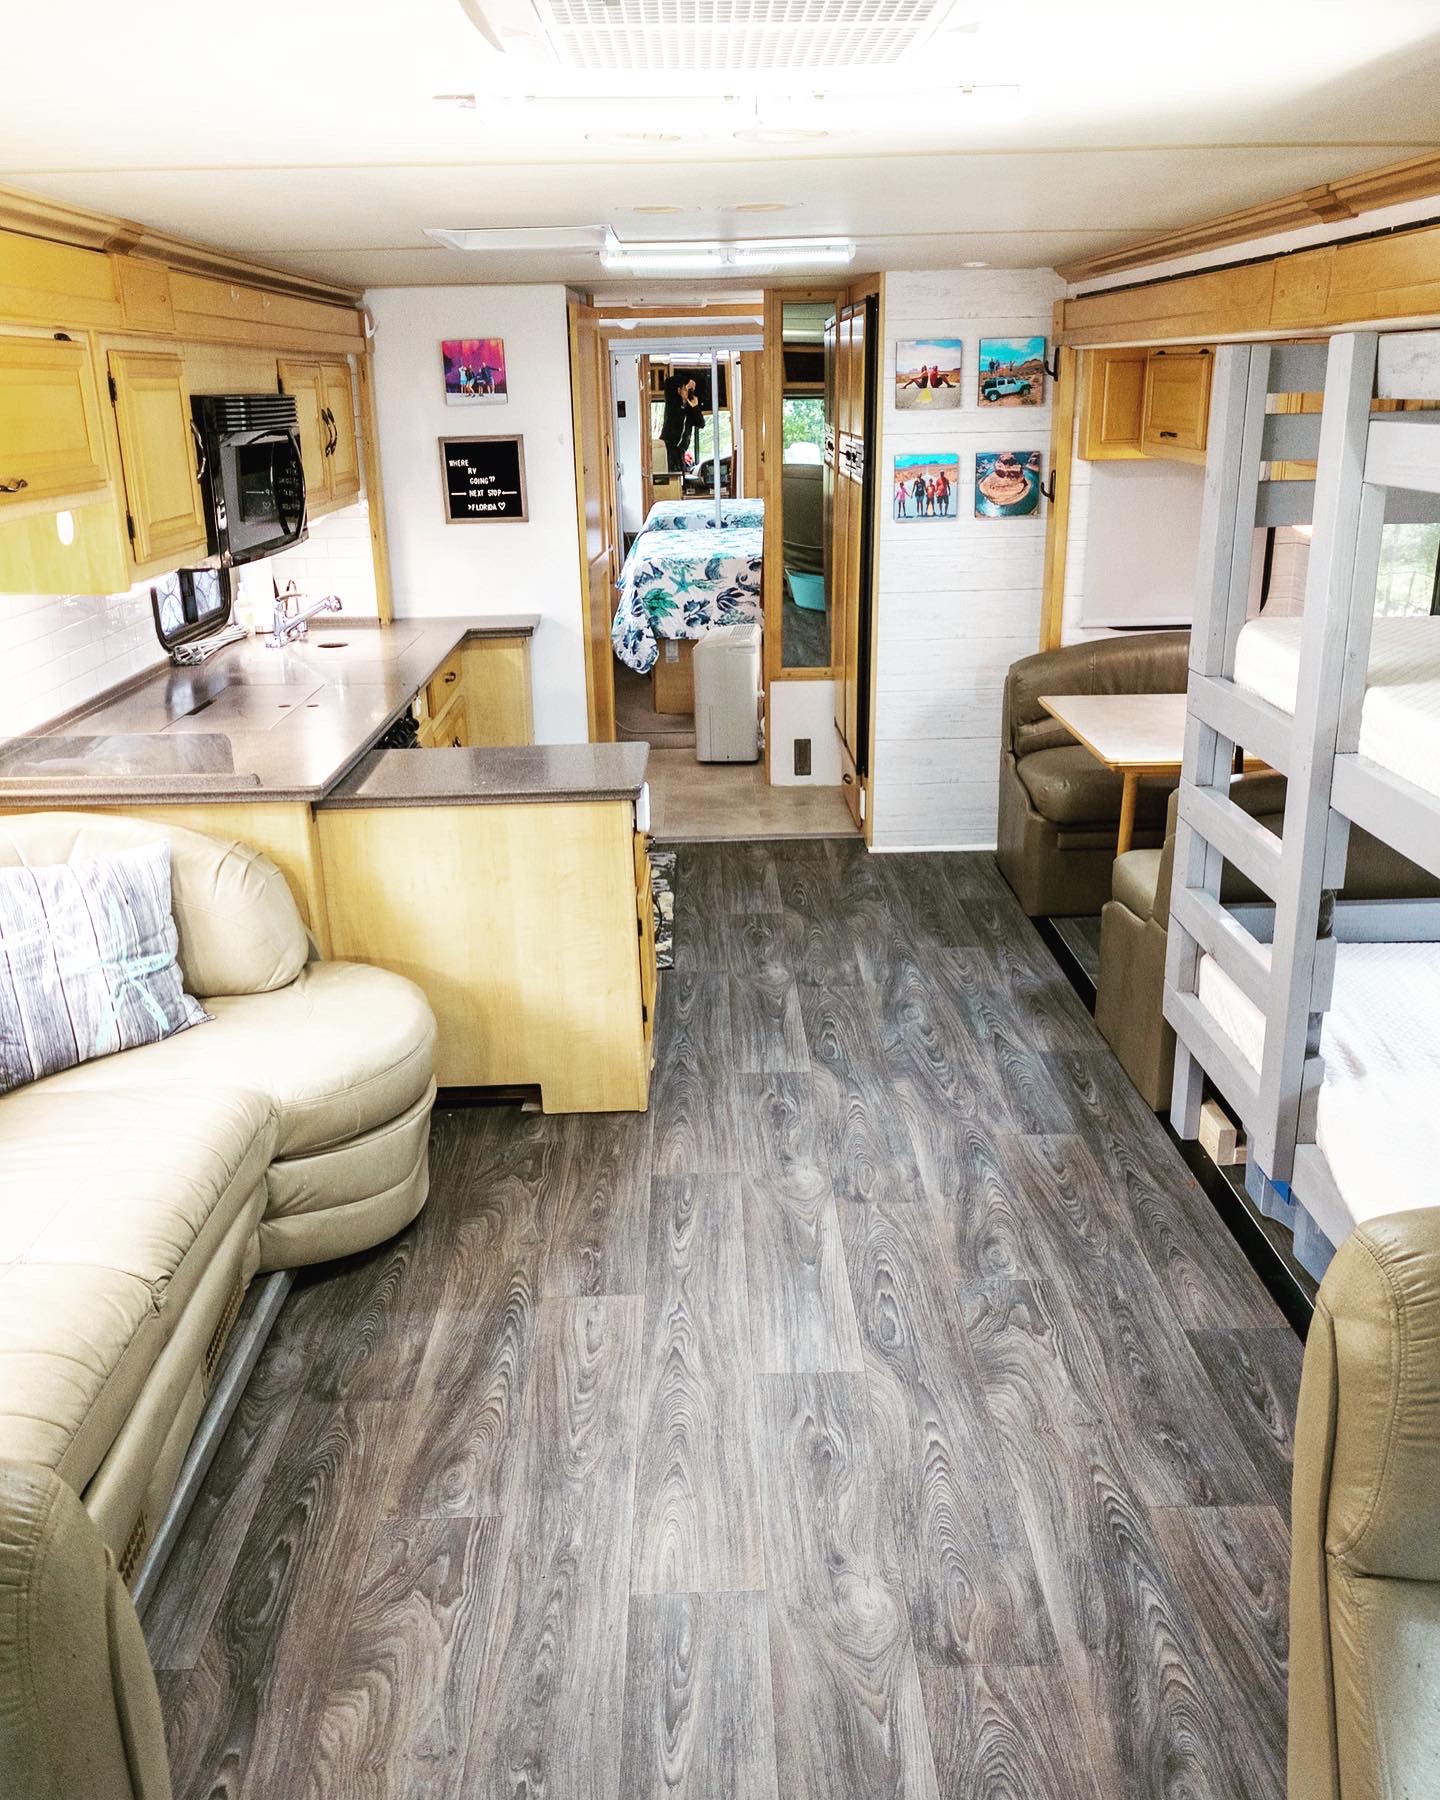
Our RV Renovation included the following:
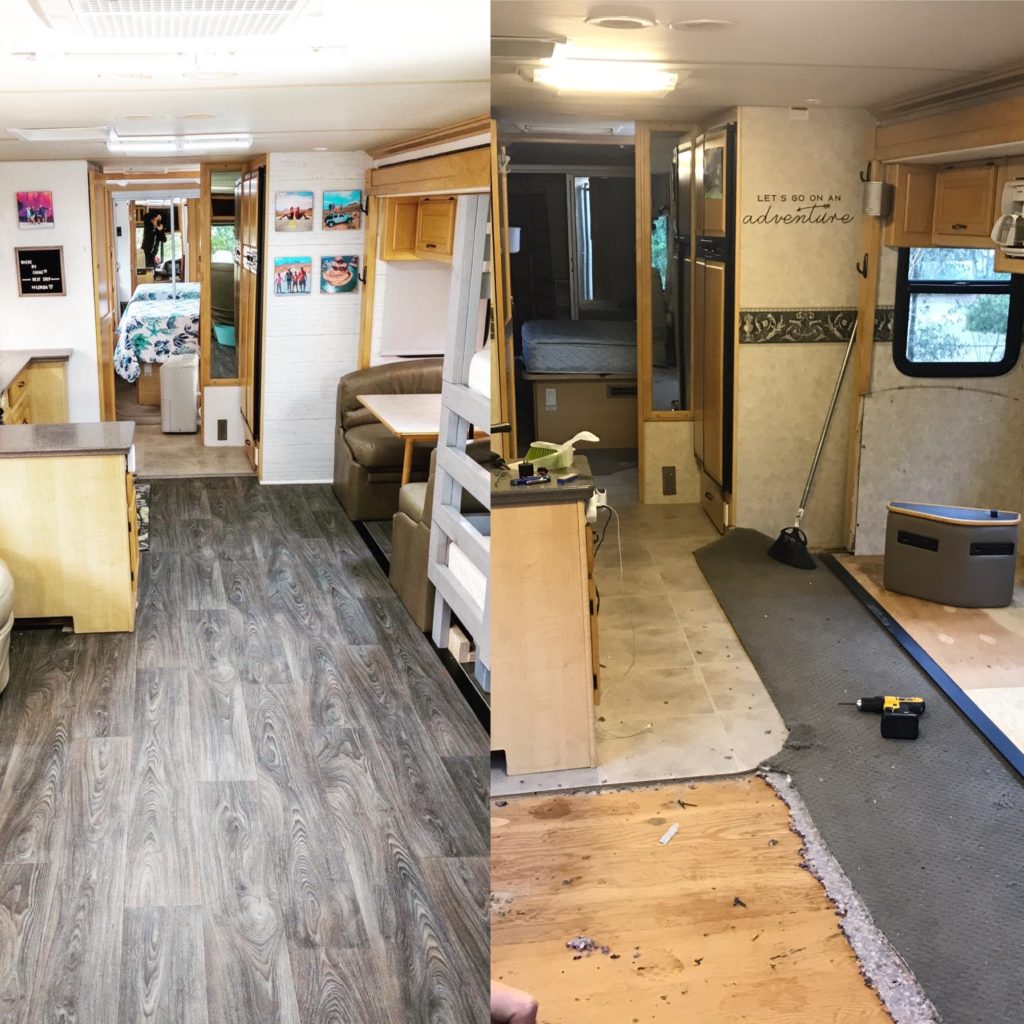
- Replaced Flooring
- Replaced Window Coverings
- Replaced Dinette (save 5% with RecPro!)
- Built Custom Bunks (I used a plan I found on the Rogue Engineer)
- Painted walls
- Window Film on two windows
- New peel/stick backsplash in Kitchen Area
- Re-installed several items including front chairs and one couch
- Added some Mods with storage areas mounted to the wall
- Spray-painted trim around vent areas in the ceiling
Overall, it took us about 6 weeks from start to finish the RV Renovation. Now, while we did not work on the RV every day during these 6 weeks, we did focus on it quite a bit for a good solid 3 weeks.
So, several questions have come in about repairing water damage. And you can check out our video on water leaks for more info on how we found and fixed our leaks.
Another question/comment we’ve had is about weight and if we might have added too much weight to the rig or the slide out with the bunks. We actually estimate that we’re at LESS weight now vs. pre-renovation. Things like the window valances, the old-style dinette, the old couch – all of these items were hefty. And the items we installed are much less weight than those we took out.
Because so many people have asked if we would do this again – we have to answer yes – we absolutely would! It was a fun project but also a satisfying undertaking to see the results. So, as a result, we have talked about making RV Renovation something we do for fun!
You can check out more photos over on Instagram,

I am interested in where you got your personalized canvas photos. I would love to decorate our new RV with family photos. Thanks! – Kimberly
Hi Kimberly, thanks for writing in! We get them through Mix Tiles 🙂 They are so great!
Hi,
I would like to know if you have a video or blog showing the advantages of buying new vs used Rv. Also how old should you buy when buying used. What to consider when buying older than 6 or 10 year old RV, cost, repairs, replacements, etc,
Hey there, while we don’t have a specific video on the pros/cons of used vs. new we do have a video on some things to consider when purchasing. https://youtu.be/QS1nmqIqEgc
Wow, wonderful blog. I really admire your topic, as it is very informative and useful for me because I am also planning to renovate my RV on a friendly budget. Well, one thing I would like to say is that along with the interior renovation, the exterior of the RV should also be renovated and well-protected. Like exterior paint, roof siding, and roof coating. In the case of roof coating, I always prefer to coat my RV roof with “RV Roof Magic” is a simple application DIY one-coat, self-leveling sealant that gives a new roof for a fraction of the cost while extending the life expectancy of the RV roof due to its incomparable features and long-lasting properties along with making the RV roof look tip-top, shiny, and aesthetically pleasing.
When it comes to the roof, we did a new spray on roof from Rvroof.com and highly recommend it! Looks are definitely secondary and protection from water leaks when it comes to the roof is a top priority. Make sure you have a lifetime warranty against water leaks.
You mentioned child safety locks, in this video or maybe an organizational one, that you can leave unlocked when not traveling. I cannot find any like that. Can you please share the brand and where you purchased?
Enjoy your you tube channel!
Thanks, Elaine
Update! I found the locks on your Amazon store! Thanks for that!
(You mentioned child safety locks, in this video or maybe an organizational one, that you can leave unlocked when not traveling. )
Awesome, yes, they are a lifesaver!
This RV makeover is a masterclass in budget-friendly transformation! From replacing flooring and window coverings to building custom bunks and adding peel-and-stick backsplash, every detail enhances functionality and style without breaking the bank. A true testament to creativity and resourcefulness. https://saveplus.ae/